25 July 2010

Macaroon Perfection


I did it. I finally did it. I finally got my macaroons to work - just as I wanted them to!

I was determined not to do another post until I had some macaroons worth posting - in the last month I've done salted chocolate, chocolate and peanut butter, choc-chai and cinnamon - and every time until today, I've ended up with those cracked little hemispheres. But these, the second shot at the salted caramel, were absolutely perfect - crispy shell, a melt in the mouth centre and that lovely little 'pop' on the sides.

There are a couple of secrets that I have discovered:

  1. You MUST keep mixing even after it is combined if the mixture is too thick. This will loosen up the egg whites and give you that lovely crispy shell. Keep mixing until small peaks in the mixture relax and settle out.
  2. Preheat your oven to 220 C. Then as soon as the macaroons go in, turn it down to 180 C.
  3. When the macaroons come out of the oven, lift up the corner of the baking paper and pour some water underneath and tilt the tray to spread the water. This will let you lift off the macaroons easily.

The recipe is exactly the same as this post - the only difference is the baking technique - start the oven at 220 C, then turn it down to 180 C for 10 minutes.


20 June 2010

Chilli Chocolate Macaroons

I can't say I was too thrilled with how the last batch of chocolate macaroons turned out - the batter was just too thick and they didn't rise particularly effectively. So I decided to try another recipe - one my mother had cut out of an old magazine (I can't find the reference unfortunately!). The batter looked like it would be way too thick and gloopy to rise at all - in fact, it looked like dogs doings on the baking parchment - but it actually rose! The tops cracked a bit, so the side didn't 'pop' like the professional ones do - but it kinda worked!

Instead of doing a plain old ganache, I decided to mix things up a little by putting a cocoa SMBC to work - and, since it's winter, warming things up a little with some chilli. NOTE: do NOT overdo the chilli powder - it will turn things from delicious to deadly if you're not careful! The filling was absolutely awesome - my boy ended up eating it out of the bowl.

Will definitely be using this recipe for all future chocolate macaroons. And FYI- the water trick is brilliant. I've always ended up with half the macaroons losing their middles to the baking paper - this trick really works.

Chilli Chocolate Macaroons
For the macaroons:
250 g icing sugar
140 g almond meal
25 g cocoa powder
100 g egg whites

For the filling:
2 egg whites
1/2 C sugar
125 g butter
2 Tbsp cocoa powder
1/2 tsp chilli powder (hot)

For the macaroons:
  1. Preheat the oven to 220 C.
  2. Sift the sugar, almond meal and cocoa powder into a bowl. (The original recipe says to use a food processor to combine and get out the lumps but I don't have one!)
  3. Whip the egg whites until just firm but still glossy - to the soft peak stage.
  4. Fold the egg whites, 1/3 at a time, into the dry mixture. It will seem really stiff - but don't worry, it rises well!
  5. Pipe the mix into 2.5 cm diameter circles onto a baking tray lined with baking paper.
  6. Put the macaroons in the oven and immediately turn down to 180 C.
  7. Bake for 10-12 minutes.
  8. When the macaroons are done, lift up the baking paper and pour a little water (about 1/4 C) under the paper and tilt the tray to distribute. If you wait 20 seconds, the macaroons will lift off easily!
  9. Place macaroons on a wire rack to cool.
For the filling:
  1. Heat egg whites and sugar in a heat proof bowl over a saucepan of simmering water, whisking all the while. Allow the temperature to reach 76 C.
  2. Once the mix is frothy and is at 76 C, remove from heat. Using an electric mixer, beat until firm peaks form.
  3. Cut the butter up into 9 or so pieces. One piece at a time, beat in the butter (if it goes runny, just keep beating - it will eventually get to the consistancy of well whipped cream).
  4. Once the mixture is firm, beat in the cocoa powder and half the chilli powder.
  5. Taste - if you think it needs more chilli, add the rest - but it's supposed to be a tiny warming kick at the end - and some people are more sensitive than others!

13 June 2010

Chocolate Macaroons with White Chocolate Ganache


After last week's relatively successful Salted Caramel Macaroons, I decided to try making my all time favourites - chocolate macaroons.

I simply substituted 40 g of icing sugar for cocoa powder. However, I forgot that cocoa powder is less soluble in hydrophillic solutions than sugar - the result of which was that my mixture was WAY too thick and therefore couldn't rise as much as the last batch. (Next time, I'd up the egg whites by 10 g or decrease the almond meal by 20 g).

They had the right crunchy shell and chewy centre - so it's not all bad. Kinda like a soft, chewy oreo when the ganache is set.

Chocolate Macaroons

For the macaroons:

3 'aged' egg whites from 59 g eggs (90 g eggwhites - to age - leave them loosely covered overnight)
2 Tbsp caster sugar
160 g icing sugar
40 g cocoa powder
110 g almond meal

For the filling:
60 g white chocolate
10 g unsalted butter
  1. Whisk egg whites until frothy and fluffy - allow it to form soft peaks.
  2. Gradually add 2 tablespoons granulated sugar until you have a glossy meringue, whisking all the while. Don’t overbeat.
  3. Sift almond meal, cocoa powder and icing sugar in a large bowl.
  4. Add your whipped egg whites and fold. You don’t have to fold too gently, but you don’t want to over fold either.
  5. Pipe the mixture onto greased baking paper. Make sure you space them well, or they will expand and stick together when they bake. Wet your finger and pat them into shape - they'll start to look like they should!
  6. Allow to sit for 1 hour. This will stop them from cracking when they bake.
  7. Bake for 20 minutes at 150 C.
  8. Once cooked, allow to cool on a wire rack.
  9. For the filling, heat the chocolate and butter in a double boiler and stir until melted and combined.
  10. Sandwich the filling between the macaroons.

06 June 2010

Salted Caramel Macaroons


After 3 weeks, numerous visits from tradies, a great deal of stress and about $10,000 - I finally have my kitchen back!

To celebrate, I decided to attempt macaroons again. Not wanting to repeat the absolute rock-hard debacle of the lime macaroons, I decided to have another go at the recipe. But this time, I actually weighed my ingredients! (Turns out, this was a good idea - it's very hard to accurately measure almond meal by volume!) This time they really worked well - they had that lovely thin crispy shell with a very soft, chewy centre. (Look at the side - you can see they have the nice 'pop'!)

Salted Caramel Macaroons (Makes 15)

You will need:

For the macaroons:

3 'aged' egg whites from 59 g eggs (90 g eggwhites - to age - leave them loosely covered overnight)
2 Tbsp caster sugar
200 g icing sugar
110 g almond meal

For the filling:

125 g salted butter
2 egg whites
1/2 C brown sugar
  1. Whisk egg whites until frothy and fluffy - allow it to form soft peaks.
  2. Gradually add 2 tablespoons granulated sugar until you have a glossy meringue, whisking all the while. Don’t overbeat.
  3. Sift almond meal and icing sugar in a large bowl.
  4. Add your whipped egg whites and fold. You don’t have to fold too gently, but you don’t want to over fold either. Add in the food colouring when about half the egg whites have been added.
  5. Pipe the mixture onto greased baking paper. Make sure you space them well, or they will expand and stick together when they bake (like mine did - see photo below!). Wet your finger and pat them into shape - they'll start to look like they should!
  6. Allow to sit for 1 hour. This will stop them from cracking when they bake.
  7. Bake for 20 minutes at 150 C.
  8. Once cooked, allow to cool on a wire rack.
  9. For the filling, heat the egg whites and brown sugar to 76 C by putting them in a bowl over a pot of simmering water, whisking continuously.
  10. Beat with an electric mixer until soft peaks form.
  11. Cut the room temperature butter into 1 Tbsp cubes. One cube at a time, add the butter to the meringue, beating continuously. If the mixture goes runny, keep beating until the mixture thickens up again.
  12. Sandwich the filling between the macaroons.

01 June 2010

Sad... No more Iron Cupcake...


Iron Cupcake:Earth is closing its doors for good in June... Sad!

The competition that inspired my cupcakery madness is no more... but at least I heart cuppycakes is still bringing us the always fun Cupcake Hero!
I'll be back with more cupcakes and cupcakery soon - once I have my kitchen back *sigh*

oh and a new electric beater - mine got destroyed by electricians...

23 May 2010

A not-so-Lazy hiatus...

Unfortunately, as you may have gathered from my ranting in earlier posts, my house is not in a good state at the moment. Earlier this week, it went from bad to worse, and I am totally without power or hot water - and have had to move in with my sister. (The power surge also killed my much loved electric mixer!) So there will be no cupcakes for a while - however, I will be back with dessert-y goodness once my house is back in some semblance of working order.

16 May 2010

Food as Fashion


I'm not normally too fussed with the presentation of food - but I'm always blown away by those who can weave magic with a camera and food. Fulvio Bonavia really takes it to a whole new level. In case you haven't already seen their amazing work, you can check it out here.


15 May 2010

Lime Macaroons


My friend's just turned 30 - so, for her birthday, I decided to make (read: attempt) her favourite sweets in the world - macaroons. Since limes are in season, I decided to make them lime flavoured - but you could make them any flavour, really. I used Bakerella's recipe for the macaroons and the filling is my own (not particularly creative) recipe.

They turned out... OK, I guess. They didn't have that nice 'pop' on the side like really good ones do; but they did rise (a bit) and they had that nice hard, crackable, crunchy shell with a deliciously chewy centre.
You can see the air bubbles in there!

Lime Macaroons (Makes 20)

You will need:

For the macaroons:

3 'aged' egg whites from 59 g eggs (to age - leave them loosely covered overnight)
2 Tbsp caster sugar
200 g (200 ml, packed) icing sugar
110 g (1 C + 1 tsp, packed) almond meal
1/4 tsp green food coloring

For the filling:

125 g butter
4 Tbsp icing sugar
zest of 2 limes
juice of 1/2 a lime
  1. Whisk egg whites until frothy and fluffy - allow it to form soft peaks.

  2. Gradually add 2 tablespoons granulated sugar until you have a glossy meringue, whisking all the while. Don’t overbeat.
  3. Sift almond meal and icing sugar in a large bowl.
  4. Add your whipped egg whites and fold. You don’t have to fold too gently, but you don’t want to over fold either. Add in the food colouring when about half the egg whites have been added.
  5. Draw small circles on a piece of non-stick baking paper (I used a 20 C piece to make sure they were all the same size). Note - don't draw the circles on the side you're going to put the macaroons on, or you'll get pen circles on the macaroons!
  6. Pipe the mixture onto the paper, using the circles as a template. I found they looked like little green dog doings... if that's the case, wet your finger and pat them into shape - they'll start to look like they should!
  7. Allow to sit for 1 hour. This will stop them from cracking when they bake.
  8. Bake for 20 minutes at 150 C.
  9. Once cooked, allow to cool on a wire rack.
  10. Whip the butter until light and fluffy.
  11. Gradually beat in the 4 Tbsp icing sugar.
  12. Beat in the lime zest and lime juice.
  13. Spread the filling on the flat side of a macaroon and sandwich with another to assemble.

10 May 2010

Emergency Omelette

It's cold. It's wet. The house is a pigstye. You've got almost no furniture or cookware - so what do you do when dinner time rolls around?

The thing I love about my emergency omelette is it's quick, easy and delicious, and can be prepared with nothing but a cutting board, a knife, a frypan, a bowl/mug and a working stove. And a spatula, of course.

This serves 2, or one very hungry person.

You will need:

1/2 Tbsp butter
1 onion, finely diced
1 Tbsp balsamic vinegar (ie 1 big glug)
1/2 capsicum, finely diced
4 field mushrooms, sliced
8 broccoli florettes
8 peeled and cooked prawns (if they are frozen, pour some cold water over them to thaw - most conneseurs will despair at the loss of flavour, but trust me, they wouldn't have had much to begin with)
2 eggs
1 Tbsp milk (a glug)
1 Tbsp sour cream (or however much you lever in with the knife)
2 handfuls grated cheese

  1. On a medium heat, melt the butter. Add the onions and allow to brown.
  2. Once onions are cooked through, add the balsamic vinegar. Allow to reduce, stirring all the while.
  3. Add the mushrooms. They wil release some liquid into the pan; cook until the liquid is evaporated.
  4. Add the capsicum and cook until it starts to soften.
  5. Add the broccoli and cook until bright green (about 2 minutes).
  6. Turn down the heat to low and add the prawns.
  7. Beat the eggs in a separate bowl. Mix in the milk and sour cream until vaugely homogenous.
  8. Pour the egg mixture over the prawn and vegetable mix.
  9. Sprinkle cheese over the top.
  10. Cook on a very low heat untilthere is only a tiny bit of runny egg left on top (don't stir it, or you'll end up with scrambled eggs!)
  11. Using either your griller or your oven. put the frying pan under a grilling heat source to cook the top of the omelette. Cook until just firm.
  12. Put a large plate over the top of the pan and invert to serve. Too easy!

09 May 2010

Cupcake-less Monday

So this week has not been what one would typically describe as special. In addition to losing not one, but two pairs of glasses, my house is in lockdown preparing for the workmen who are (finally) coming to repair the damage caused by a storm in March, resulting in all the furniture in the living, dining and store rooms being moved into a glorified walk in wardrobe. While the hole in the roof continues to shower me in asbestos. Oh, and my hot water heater has packed it in.

Like I said - this week has not been kind to me.

The upshot of all this is that I haven't had the time to make any cupcakes this week. Hopefully by Wednesday, the plastering will be at least semi-finished, and I'll have been able to get a tradesman out to the house to fix the hot water (so I can actually do my washing up - how novel!) - so cupcakes will materialise. Eventually. I hope.

I'm planning on a black forrest inspired chocolate-cherry combo, and a zingy lime. But not until my house has some semblance of order returned.

But do not despair - I will be posting a couple more Lazy recipes this week, starting tomorrow with my Emergency Omelette.

03 May 2010

"Red Velvet" Cupcakes


Red Velvet cupcakes seem to have a bit of a varied reputation. Some people absolutely love them; others simply don't see the point and find them bland and boring. So I decided to jazz them up a bit by adding some strawberry jam.

I also didn't have any cocoa powder, so I used hot chocolate mix *blushes* - so I don't think you can properly call these Red Velvet cupcakes - more like "Red Velvet".

Turns out that adding the jam was the best happy accident I've ever had. Not sure if it's the pectin in the jam or what, but replacing 1/4 C of milk with jam make an absolutely beautiful and fluffy cake with an incredible crumb. It honestly doesn't seem gluten free - but it is!

However, I made the mistake of trying out some new cupcake cases. They didn't quite fit my cupcake trays, with the end result being that most of my cupcakes had hemispherical bottoms, which, let's face it, is not the most practical shape! (Although they looked very pretty in their cases!)


125 g butter (room temperature)
1/2 C hot chocolate powder
1 tsp vanilla
1 tsp red food coloring
2 eggs
1 1/4 C self raising gluten free flour
1/4 C milk
1/4 C strawberry preserve

  1. Preheat the oven to 180 C. Line a 12 hole cupcake tin with cupcake cases.
  2. Cream butter until light and fluffy.
  3. Mix in hot chocolate powder with a wooden spoon until combined. (Trust me - or you'll end up with a face full of powder if you try and cream it straight away!) Cream until pale. Beat in vanilla.
  4. Beat in 1 egg. Scrape down the sides. Beat in the second egg and scrape again.
  5. Mix in the flour in 3 additions, alternating with the milk and jam in 2 additions, mixing continuously.
  6. Stir through red food coloring.
  7. Divide evenly into cupcake cases.
  8. Bake for 25 minutes or until a skewer inserted into the middle of the cake comes out clean.
Chocolate Cream Cheese Frosting
62 g butter (or 1/2 a stick to Americans)
5 Tbsp hot chocolate powder
250g tub light cream cheese
  1. Cream butter and hot chocolate powder together until light and fluffy (note: it's a good idea to mix it with a spoon until all the powder has been wetted with the butter or you'll end up with a face full of powder).
  2. With the mixer on low speed, beat in the cream cheese until just combined (if you overmix, it will go weird and liquid...)
  3. Spread or pipe onto cooled cupcakes.

29 April 2010

Winter Apple Cupcakes

We had a long weekend last weekend, so in the spirit of the lovely cool weather we've been having lately, I decided to make something wintery and delicious.

I just mucked around with my normal vanilla cupcake recipe (hey, I've found a gf cake recipe that doesn't go dry - I'm almost too afraid to try another one in case it goes all dry and horrible!) . I swear, next time I'll try a new recipe! Really!

125 g butter (room temperature)
2/3 C caster sugar
1 tsp vanilla
2 eggs
1 1/4 C self raising gluten free flour
1 Tbsp milk
1/4 C Cream Cheese
1 1/2 granny smith apples, peeled, cored and diced into 1 cm pieces
juice of 1/2 a lemon
2 tsp cinnamon
  1. Preheat the oven to 180 C. Line a 12 hole and a 6 hole cupcake tin with cupcake cases.
  2. Squeeze the lemon over the chopped apples (this will stop them browning and adds a lovely zing)
  3. Cream butter and sugar together until pale. Beat in vanilla.
  4. Beat in 1 egg. Scrape down the sides. Beat in the second egg and scrape again.
  5. Mix in the flour and cinnamon in 3 additions, alternating with the milk and cream cheese in 2 additions, mixing continuously.
  6. Stir through the apples
  7. Divide evenly into cupcake cases.
  8. Bake for 30 minutes or until a skewer inserted into the middle of the cake comes out clean.
Note: the batter doesn't quite cook evenly through the cake - the batter around the apples stays a bit wet even when the rest of the cake is cooked. If I was going to do it again, I'd either bake the apple cubes first to dry them out a bit, or increase the milk to 1/4 C and use 1/2 C dried apple pieces instead.


I was feeling particularly lazy this week (as you can probably guess by the fact it took me 4 days to post!) so I didn't ice them. They were so moist and sweet,

20 April 2010

Southern Pulled Pork

OK so I have a confession. Cupcakes aside, my biggest weakness is southern US and central American cuisine. TexMex, soul food, Creole, Yucatan, Mexican, Cuban - I love them all. When I was a teenager, a group I performed with did some touring in that area and I just fell in love with the cuisine.

Pork is a huge part of the diet over there. It's much cheaper than it is in Australia, and pork can be slow cooked in a myriad of ways - and every time it seems to come out moist and sumptious. I was feeling terribly nostalgic last week, and was craving the pulled pork I had in Dallas. Sweet, meaty, sticky and covered in a unctiously smoky barbecue sauce, it was a dish I'll never forget. Problem is, you can't seem to find that type of food anywhere in Australia - so I decided that I was craving it enough to make it for myself.

Since I don't have a slow cooker, I used an oven baked recipe. I was pretty happy with how it turned out - the barbecue sauce was quite acidic and runny, so I only ended up using half - but a small amount make the pork simply perfect! I'd never acutally used a dry rub before - this one is delicious, but makes much more than you need! I'm using the leftovers to make chicken wings - yum!

Southern Pulled Pork

You will need:

Dry Rub:

3 tablespoons paprika I used smoked paprika - it made it that much better!
1 tablespoon garlic powder
1 tablespoon brown sugar
1 tablespoon dry mustard
3 tablespoons coarse salt I used 1 Tbsp fine salt
1 (5 to 7 pound) pork roast, preferably shoulder or Boston butt I used a 1.8 kg deboned rolled shoulder

Cider Vinegar Barbecue Sauce:

1 1/2 cups cider vinegar
1 cup yellow or brown mustard I used seeded mustard
1/2 cup ketchup
1/3 cup packed brown sugar
2 garlic cloves, smashed
1 teaspoon salt
1 teaspoon cayenne
1/2 teaspoon freshly ground black pepper


Mix the paprika, garlic power, brown sugar, dry mustard, and salt together in a small bowl. Rub the spice blend all over the pork and marinate for as long as you have time for, as little as 1 hour or up to overnight, covered, in the refrigerator. This rub sma

Preheat the oven to 150 C.

Put the pork in a roasting pan and bake for about 6 hours. Basically, roast the pork until it's falling apart. Mine took 4 1/2 hours because it was a little smaller

To make the barbecue sauce: combine the vinegar, mustard, ketchup, brown sugar, garlic, salt, cayenne, and black pepper in a saucepan over medium heat. Simmer gently, stirring, for 10 minutes until the sugar dissolves.

Remove the pork roast from the oven and transfer to a large platter. Allow the meat to rest for about 10 minutes. While still warm, take 2 forks and "pull" the meat to form shreds. Using 2 forks, shred the pork by steadying the meat with 1 fork and pulling it away with the other. Put the shredded pork in a bowl. Pour 1/2 of the sauce on the shredded pork and mix well to coat. If you can stop licking your fingers when you do this, you have much more restraint than I do!

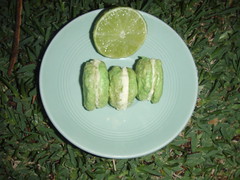
Serve on tacos or fresh bread with coleslaw or guacamole. This is finger-licking food - the best kind of food. Yummo!

19 April 2010

Black and White Cupcakes

A good friend of mine from work turned 26 last night. As her birthday present, she asked me to make some cupcakes.

I was feeling a little under the weather and stressed, so I simply combined the Vanilla Cupcakes and Hot Chocolate Cupcake recipes to make Black and White Cupcakes (or if you will, Michael Jackson Cupcakes). Awesome.

Just a tip - make the batters simultaneously so they don't dry out!

Black and White Cupcakes (Makes 24)

Vanilla cupcake batter:
125 g butter (room temperature)
2/3 C caster sugar
1 tsp vanilla
2 eggs
1 1/4 C self raising gluten free flour
1/2 C milk
  1. Preheat the oven to 180 C. Line a 12 hole cupcake tin with cupcake cases.
  2. Cream butter and sugar together until pale. Beat in vanilla.
  3. Beat in 1 egg. Scrape down the sides. Beat in the second egg and scrape again.
  4. Mix in the flour in 3 additions, alternating with the milk in 2 additions, mixing continuously.
  5. Divide evenly into cupcake cases.
Hot Chocolate Cupcake batter:

125 g butter (room temperature)
2/3 C hot chocolate powder (I used Cadbury's as it's gluten free)
1 tsp vanilla
2 eggs
1 1/4 C self raising gluten free flour
1/4 C milk
1/4 C Sour cream


  1. Cream butter and hot chocolate powder together until pale. Beat in vanilla.
  2. Beat in 1 egg. Scrape down the sides. Beat in the second egg and scrape again.
  3. Mix in the flour in 3 additions, alternating with the milk and sour cream in 2 additions, mixing continuously.
  4. Divide evenly into cupcake cases on top of the vanilla batter. Swirl the batters together with a toothpick.
  5. Bake at 180 C for 20 minutes.
For the Fluff:
6 egg whites
1 C sugar
2 Tbsp vanilla

For the Fluff (this is just Swiss Meringue!):
  1. Over a saucepan of simmering water, whisk together egg whites and sugar until the mixture is hot (72 C) and frothy. This usually takes quite a while - 8-10 minutes.
  2. Using an electric beater, beat the egg whites until stiff peaks form and mix is cool.
  3. Beat in vanilla.
  4. Pipe or spread mixture onto cupcakes.

I then piped some melted chocolate over the top. Delish!


11 April 2010

Hot Chocolate Cupcakes

Following the success of the Vanilla Cupcake recipe, I wanted to see if there were any adaptations that were possible. Turns out drinking chocolate powder makes an excellent substitute for sugar - especially when you replace some of the milk with sour cream! However, I made the mistake of trying to incorporate marshmallows into the batter - they bubbled up and ran down the sides, gluing the patty pans to the tin. Turns out baked marshmallow is approximately the consistancy of tar. Yummy. Apart from that though - delicious! I used a vanilla SMBC as homage to the whipped vanilla cream I love on top of hot chocolate.


You will need:

125 g butter (room temperature)
2/3 C hot chocolate powder (I used Cadbury's as it's gluten free)
1 tsp vanilla
2 eggs
1 1/4 C self raising gluten free flour
1/4 C milk
1/4 C Sour cream
12 marshmallows (I used neopolitan but you could use vanilla or strawberry)

  1. Preheat the oven to 180 C. Line a 12 hole cupcake tin with cupcake cases. Place a marshmallow in each case.
  2. Cream butter and hot chocolate powder together until pale. Beat in vanilla.
  3. Beat in 1 egg. Scrape down the sides. Beat in the second egg and scrape again.
  4. Mix in the flour in 3 additions, alternating with the milk and sour cream in 2 additions, mixing continuously.
  5. Divide evenly into cupcake cases. Bake for 20-25 minutes or until a skewer comes out clean.
  6. Cool on a wire rack.

Vanilla SMBC

You will need:

3 egg whites
1/2 C sugar
125 g butter
2 tsp vanilla extract
  1. In a large, clean heatproof bowl, combine the egg whites and sugar. Set the bowl over (but not touching) simmering water in a saucepan and heat the mixture, whisking constantly, until the sugar has completely dissolved and the mixture is very warm to the touch. Remove the bowl from the saucepan.
  2. Using an electric mixer on high speed, beat the egg white mixture until it is fluffy, cooled to room temperature, and holds stiff peaks (the mixture should not look dry), about 6 minutes.
  3. With the mixer on medium-low speed, add the the butter, a few pieces at a time, beating well after each addition. If the icing appears to separate or is very liquid after all the butter is added, continue to beat on high speed until it is smooth and creamy, 3-5 minutes more. Add the vanilla extract scraping down the sides of the bowl as needed.

29 March 2010

White Chocolate Mud Cupcakes

This week's cupcakes were quite a long time in the making - and very much required. You might have heard about the storms that battered Perth last Monday - it made it onto the CNN news, among other sources - which caused, via about thirty litres of water, my ceiling to end up on my floor in 3 rooms. So. My carpet has been ripped up, I have the (dry) contents of said rooms stacked up in my kitchen, and I have had builders around every day this week. That on top of working 75 hour weeks means that cupcakes are a) hard to find the time to make, but b) very much needed!

I originally intended to make a sour cream white chocolate SMBC, but I couldn't get the darn stuff to thicken. Turns out you can't use sour cream as a substitute for butter in SMBC! So I used the leftover swiss meringue to make a fluffy topping, and piped over the rest of the chocolate mixed with the sour cream. I was not impressed - but they still ended up tasting delicious. And they even stayed moist for 36 hours!

White Chocolate Mud Cupcakes - from Exclusively Food

You will need:

For the Cupcakes: (Makes 12)
225g white chocolate
150gbutter
3/4 C milk
1/2 C caster sugar
2 teaspoons (10ml) vanilla extract
2 smallish eggs, lightly beaten
1/2 C self-raising flour
3/4 C plain flour

For the Fluff:
2 egg whites
1/3 C brown sugar

For the White Chocolate Swirl:
2 Tbsp sour cream
100 g white chocolate

  1. Preheat oven to 160 degrees Celsius (145 degrees Celsius fan-forced).
  2. Line a 12 hole cupcake pan with patty pans.
  3. Place chocolate, butter, milk and sugar in a large saucepan over low heat, stirring frequently. Remove from heat when chocolate and butter have melted, and stir mixture until completely smooth. Allow mixture to cool at room temperature for 15 minutes.
  4. Add vanilla and eggs to chocolate mixture and stir until well combined.
  5. Stir flours together in a large bowl. Add one cup of chocolate mixture to the flour and stir until a smooth paste forms.
  6. Add remaining chocolate mixture and stir until mixture is smooth. This gradual method of combining the wet and dry ingredients helps prevent lumps.
  7. Pour mixture into cupcake tin.
  8. Bake for 30 minutes or until a skewer comes out clean. Allow to cool before frosting.
For the Fluff (this is just Swiss Meringue!):
  1. Over a saucepan of simmering water, whisk together egg whites and sugar until the mixture is hot (72 C) and frothy. This usually takes quite a while - 8-10 minutes.
  2. Using an electric beater, beat the egg whites until stiff peaks form and mix is cool.
  3. Pipe or spread mixture onto cupcakes.
For the White Chocolate Swirl:
  1. Stirring frequently, microwave the white chocolate and sour cream together in a bowl on medium in 30 second bursts until mixture is melted and homogenized.
  2. Pipe the mixture over the top of the fluff on the cupcakes.

28 March 2010

Gluten Free Hot Cross Buns

In the spirit of Easter, I spent most of my Saturday out looking for gluten free hot cross buns - but to no avail. Perth really struggles when it comes to GF accessibility sometimes. So I tried to make some myself!

This was the first time I've ever worked with yeast. I *think* the yeast I used was gluten free - by law, gluten content now has to be disclosed - but you could kind of tell that I'd never made anything remotely bread-like before! I couldn't find gluten free bread flour, so I used normal plain flour. I also had some issues piping on the crosses - I had my piping bag inside out (whoops!) so it didn't pipe particularly well and oozed out the bump where the seam hit the nozzle... but still. They turned out less badly than I'd thought but were still quite dense. None the less, when toasted and slathered in butter, they are well worthwhile.


Gluten Free Hot Cross Buns - based on this recipe

You will need:

110g (1/2 cup) caster sugar
2 teaspoons dried yeast
250ml (1 cup) milk (at room temperature)
75g butter, melted
1 egg, lightly beaten
600g (4 cups) plain flour, plus extra, if necessary
2 teaspoons ground cinnamon
1 teaspoon ground nutmeg
1/2 teaspoon ground ginger
1 1/2 C dried fruit (I used dried cranberries)
1 tsp salt

2 tsp milk, for glazing

for the crosses:
1/2 C plain flour
2 tsp sugar
1/3 C water
  1. In a small bowl, combine a large pinch of the sugar with 125ml (1/2 cup) body temperature water, then sprinkle yeast over it. Stand mixture in a draught-free place for 7 minutes or until it becomes foamy.

  2. Combine yeast mixture in a large bowl with the milk, butter and egg and stir to combine well.

  3. Add flour, spices, dried fruits and 1 teaspoon salt, then stir until combined and a coarse dough forms (it may be necessary to use your hands).

  4. Turn dough out onto a lightly-floured surface then, using your hands, knead dough for 10 minutes or until smooth and elastic, adding a little more flour if dough is sticky. Take care not to add too much extra fl our or buns will be heavy.

  5. Place dough in a large, greased bowl, turning to coat, then cover with plastic wrap and leave in a draught-free place for 1-1 1/2 hours or until doubled in bulk.

  6. Using your fist, gently punch dough down to deflate. Turn dough out onto a lightly-floured surface, pat into a rough round shape, then ask an adult to cut into 12 even-sized pieces with a large, sharp knife.

  7. Roll each piece into a ball then place, 6cm or so apart, on a greased tray.
    Cover loosely with a kitchen towel and stand in a draughtfree place for 1 hour or until doubled in size. Grease base and side of one 58x30cm (or base and sides of two 29x16cm) baking dish(es) and pre-heat oven to 200°C.
    Using a metal spatula, and taking care not to deflate buns, place in dish(es), spacing them evenly apart. Brush surface of the roll with milk.

  8. For crosses, combine flour and 80ml (1/3 cup) water in a small bowl and stir until smooth and combined. Place mixture in a piping bag fitted with a small, plain nozzle and pipe a cross shape over the top of each bun. Bake for 20 minutes (mine took 40), or until golden and risen, then turn out onto a wire rack and allow to cool.

27 March 2010

Cupcake Hero - Caramel Strawberry Cupcakes - Update!

So... I was checking out the latest update from I Heart Cuppycakes - and (god bless her) getting the latest on the Cupcake Hero throwdown. Turns out I was the lucky Baker's Choice Challenger for the Caramel throwdown!

*insert music from Rocky here*

C'mon little Strawberry Caramel Cupcake... work your magic baby!

21 March 2010

The Search for the Perfect Gluten Free Vanilla Cupcake - Update!

So, for quite some time now, I've been looking for the Perfect Gluten Free Vanilla Cupcake. I've had a few struggles along the way - such as last week's debacle - but I have finally moved in the right direction with Exclusively Food's Vanilla Cupcakes. Light, fluffy and subtly sweet, these cupcakes are moist - and ironically, are almost identical to my favourite cupcake recipe, Salted Caramel Cupcakes (but without the brown sugar) which manage to keep for a good 3 days!

In the words of Rex Harrison - By George, I think she's got it!

I just bought my very first piping bag, and have done an absolutely terrible job with the piping - please forgive the appalling piping job! These cupcakes look like something out of a Dr. Seuss book (you can eat them on a log; you can eat them with a dog) but taste amazing.

Exclusively Food's Vanilla Cupcakes

You will need:

125 g butter (room temperature)
2/3 C caster sugar
1 tsp vanilla
2 eggs
1 1/4 C self raising gluten free flour
1/2 C milk
  1. Preheat the oven to 180 C. Line a 12 hole cupcake tin with cupcake cases.
  2. Cream butter and sugar together until pale. Beat in vanilla.
  3. Beat in 1 egg. Scrape down the sides. Beat in the second egg and scrape again.
  4. Mix in the flour in 3 additions, alternating with the milk in 2 additions, mixing continuously.
  5. Divide evenly into cupcake cases. Bake for 20-25 minutes or until a skewer comes out clean.
  6. Cool on a wire rack.
Vanilla SMBC

You will need:

3 egg whites
1/2 C sugar
125 g butter
2 tsp vanilla extract

  1. In a large, clean heatproof bowl, combine the egg whites and sugar. Set the bowl over (but not touching) simmering water in a saucepan and heat the mixture, whisking constantly, until the sugar has completely dissolved and the mixture is very warm to the touch. Remove the bowl from the saucepan.
  2. Using an electric mixer on high speed, beat the egg white mixture until it is fluffy, cooled to room temperature, and holds stiff peaks (the mixture should not look dry), about 6 minutes.
  3. With the mixer on medium-low speed, add the the butter, a few pieces at a time, beating well after each addition. If the icing appears to separate or is very liquid after all the butter is added, continue to beat on high speed until it is smooth and creamy, 3-5 minutes more. Add the vanilla extract scraping down the sides of the bowl as needed.

I've figured out that the big issue is the fat:flour ratio. I'm not sure why the additional fat helps prevent the cakes from going stale, but I've been having a bit of a think about what's going on...

Now this is just some guesswork based on how I know xantham gum and gluten behave chemically... [Beware - sciency bit coming up] In normal cupcakes, the gluten creates a lattice, helping trap the water molecules and preventing them evaporating, leaving them moister for longer. Over time, the water can migrate through the lattice, making the cakes eventually go stale. In gluten free cakes, there a) is no gluten lattice to help trap the cupcakes, and b) the xanthan gum is more soluble in water, meaning that a lattice isn't formed until a later stage during the baking. Adding additional fat a) simulates the moist mouthfeel, and b) helps retain the moisture by forming emulsions (the xantham gum also acts as an emulsifier - or at least, I think it would...). Or I could be completely wrong. Meh - either way - fixing the fat:flour ratio makes a huge difference.

Edit: The Next Day Verdict

As I predicted, these cakes were just lovely the next day. And even - believe it or not - the day after! These cakes were delicious right up until they were all gone - I was incredibly impressed.

14 March 2010

Vanilla High Hat Cupcakes

Woo! Finally back in the game. Have had a rather horrendous week - I've had a horrible bout with the flu (and then a sinus infection from hell) that has kept me in bed until, well, yesterday. And nobody wants to eat fluey cupcakes.

So today marks the first cupcakes in a fortnight - and in the pursuit of the perfect vanilla cupcake, I used the Women's Weekly Little Pies and Cakes Patty Cakes recipe I discussed in this post.


Vanilla High Hat Cupcakes

You will need:

For the cupcakes:
125 g softened butter
3/4 C caster sugar
1 tsp vanilla extract
3 eggs
2 C self raising flour
1/4 C milk

For the swiss meringue:
3 egg whites
3/4 C sugar
boiling water

For the chocolate (aka the chocolate pit of death):
200 g milk chocolate
1 Tbsp oil (I used olive but you can use whatever you have - canola or vegetable is fine)
  1. Preheat oven to 180 C and line a 12 hole cupcake tin with patty cases.
  2. Mix together cupcake ingredients using an electric beater (I beat the butter and sugar together first, then added the vanilla, eggs, flour and milk in that order).
  3. Bake for 25 minutes on 180 C or until a skewer comes out clean. Allow to cool for 5 minutes in the tray, then tip upside down onto a wire rack to cool.
  4. Using a double boiler, (i.e. over a pot of boiling water) whisk meringue sugar and egg whites together until the mixture reaches 70C.
  5. Using an electric beater, beat the egg whites and sugar until mixture is thick and firm and stiff peaks form (it should look nice and glossy).
  6. Allow meringue to cool - if it softens, beat until it firms back up.
  7. Pipe meringue onto cooled cupcakes.
  8. In a deep glass wide enough to admit the cupcakes, melt the chocolate by microwaving on medium for 10-20 second bursts. Stir after each heating.
  9. Add the olive oil into the chocolate mix and stir (really well!) until fully combined.
  10. Lay down some paper towel where you will be working - this does get messy!
  11. Dip the meringue on the cupcakes gently into the chocolate - holding the cupcakes by the base makes this easier. Try to shake off as many drips as you can without knocking any meringue into the mixture.
Horror stories abound about the entire top falling off the cupcakes while dipping into the chocolate pit of death - this is not something to attempt lightly. Or cleanly. Accept the fact that whatever you are wearing - plus your face and hands - will end up absolutely covered in chocolate. Then move on - because it's worth it! Chocolate high hats are so pretty and they really give your cupcakes that little bit of extra oomph.

The actual cupcake recipe was pretty disappointing though - less than 6 hours after baking, they were completely dry and stale. Ugh - what a waste of ingredients.

Edit - The Next Day Verdict
So I brought the cupcakes into work the next morning - while the high hat itself was still lovely and well received, the cupcake was described as 'Saddam's lost weapon of mass destruction' - and that was one of the more complimentary adjectives! So yeah - verdict for the high hat process is a big thumbs up - but don't even bother with the cake recipe.

08 March 2010

The Search for the Perfect Gluten Free Vanilla Cupcake

I know this is hardly groundbreaking stuff - the Perfect Vanilla Cupcake is pretty much the holy grail of cupcake making. It is somewhat complicated by the fact that it is gluten free, since the gluten free flour tends to absorb moisture at a different rate than normal flour; the result of which is that the cakes tend to have a 12 hour shelf life before they start to go stale. Not ideal.

Most people I know (who are so inclined to think of cupcakes in that way and have been to NY) swear by the Magnolia Bakery Vanilla Cupcake recipe. Not so when they're gluten free - they're lovely if you manage to eat them within 12 hours of taking them out of the oven; but leave it any longer than that and you may as well treat yourself to a lovely vanilla hockey puck. (Yum.)

So - I'm in search of recipes. Specifically, your favourite vanilla cupcake recipe. Please (pretty please with a cherry on top!) reply to this post with either a link to your favourite vanilla cupcake recipe, or a copy of the recipe itself.

Here are the ones I am planning on trying thus far:

Taste.com.au's Classic Vanilla Cupcakes
Women's Weekly Little Pies and Cakes Patty Cakes with Glace Icing
Exclusively Food's Vanilla Cupcake Recipe
HTEAC's White Velvet Cupcakes

Any other suggestions?

05 March 2010

For when you're not at your best...


The gods are clearly smiling on me at the moment - have come down with a few nasty ailments and am stuck in bed for at least the next 3 days. Fun times.

So. Some recipes that are soooo incredibly easy to whip up (even when you feel like death warmed up) and are delicious, nutritious and comforting.


Chicken and Veg Noodle Soup

1/4 C frozen peas (or fresh peas if you can get them)
1/4 C fresh mushrooms
1 chicken stock cube (or fresh chicken stock)
1 C boiling water
1/4 small packet rice noodles

Large mug
Microwave
  1. Place peas and mushrooms in mug. Crumble stock cube over the top. Pour boiling water over the vegetables and stir until the stock cube is dissolved.
  2. Microwave on high for 30 seconds.
  3. Stir the stock with the noodles until they soften and can fit into the mug.
  4. Microwave on high for 2 minutes.
  5. Enjoy and get better!

03 March 2010

The Sad Demise of My Laptop

Unfortunately, on Monday my beloved laptop of 7 years had a bit of an accident and, to cut a long story short, is no more. It's too old to get fixed (sad) so I've had to go and buy a new one (which I'm still figuring out - I can't say Windows 7 has grown on me much yet, but I dare say I'll learn!).

Establishing the nuances of the computer, combined with working 12 hour days (as I have for every day this week) doesn't leave an awful lot of time for cooking or blogging, so please forgive me if posts are somewhat sparse in the next 48 hours or so.

But I promise I'll be back to full strength soon - with more recipes and photos, of both the lazy and cupcakery variety!

02 March 2010

IC:E - Vote Now Open

As you know, this month I steeled myself to submit 2 IC:E entries for the Passion themed contest - Fig & Honey and CranOrange Meringue. Voting is now open here - please click and vote for whichever was your favourite (or indeed, both if you are feeling generous and lovely!).

Fig & Honey Cupcakes - Entry 1
CranOrange Meringue Cupcakes - Entry 2

01 March 2010

Cupcake Hero - Caramel Strawberry Cupcakes

As a kid, one of my favourite caramel lollies was strawberry toffee. These cupcakes were inspired by that lolly - and are my first ever cupcake hero entry.

The cake recipe was borrowed from How to Eat a Cupcake (God bless her!); the buttercream and tuille recipes are my own creations.

Caramel Strawberry Cupcakes You will need:

1 1/4 cups all-purpose gf flour
3/4 tsp gf baking powder
1/4 tsp salt
1 cup firmly packed dark brown sugar
1/2 cup granulated sugar
125 g unsalted butter, at room temperature
2 large eggs, at room temperature
1 tsp vanilla extract
1/2 cup whole milk

Strawberry Buttercream
2 large egg whites, at room temperature
1/2 cup brown sugar
Pinch salt
125 g unsalted butter, cut into cubes (at room temperature)
2 Tbsp strawberry jam

Toffee Tuille
1/2 cup sugar
1 Tbsp butter

3 bowls
electric beater
scraper
saucepan
measuring jug + spoons
wooden spoon
wire cooling rack
muffin tin and pattypans
baking paper
flat tray


For the cupcakes:
Position a rack in the middle of the oven and preheat to 180°C. Line a standard 12-cup muffin pan with paper or foil liners.

In a bowl, whisk together the flour, baking powder and salt. In another bowl, using an electric mixer on medium-high speed, beat the sugars and butter together until light and fluffy, 2-3 minutes. Add the eggs and vanilla and beat until combined. Add flour mixture in 3 additions, alternating with the milk in 2 additions, beating on low speed until just combined; scrape down the sides of the bowl as needed.

Divide the batter evenly among the prepared muffin cups, filling each about two-thirds full. Bake until a toothpick inserted in the center of a cupcake comes out clean, 20-22 minutes (Mine were done at 40 minutes). Let the cupcakes cool in the pan on a wire rack for 5 minutes. Transfer the cupcakes to the wire rack and let cool completely, about 1 hour.
Strawberry Buttercream

In a large, clean heatproof bowl, combine the egg whites and sugar. Set the bowl over (but not touching) simmering water in a saucepan and heat the mixture, whisking constantly, until the sugar has completely dissolved and the mixture is very warm to the touch. Remove the bowl from the saucepan. Using an electric mixer on high speed, beat the egg white mixture until it is fluffy, cooled to room temperature, and holds stiff peaks (the mixture should not look dry), about 6 minutes.

With the mixer on medium-low speed, add the salt and the butter, a few pieces at a time, beating well after each addition. If the icing appears to separate or is very liquid after all the butter is added, continue to beat on high speed until it is smooth and creamy, 3-5 minutes more. Add the strawberry jam, scraping down the sides of the bowl as needed.
Toffee Tuille

Line large, flat tray with baking paper. Melt 1/2 cup sugar in a saucepan on medium heat. When it has turned golden brown, add 1 Tbsp butter - it will froth a bit so be careful! As soon as the butter is melted, spoon toffee onto baking paper and allow to set. Break into 12 even pieces.

Top the cooled cupcakes with the buttercream and tuille. Delish!

27 February 2010

Summer Seafood Salad

(Man, I'm going nuts with the post title alliterations!)

My mum, like me, has a serious soft side for good food. Unlike me, she has no particular love of cooking (35 years in a board room will do that to a person) but is prepared to spend big bucks on getting the quality of food she wants.

So we came to an arrangement - once a week, she buys the ingredients; I prepare the meal.

This salad is DELICIOUS - but not the cheapest meal you'll ever have. But it is yummy, healthy and perfect for hot weather.
Summer Seafood Salad (Serves 2)

You will need:

20 prawns (cooked, peeled and deveined)
1 lime
1 cup mixed baby green leaves, loosely packed
flesh of 1 mango, cut into cubes (cut the cheeks off, score and turn cheek inside out to get cubes - run a spoon along the base of the cubes against the inside of the skin and they just pop off)
flesh of 1 avocado, cut into cubes (treat it the same as the mango)
200 g snow peas, topped, tailed and chopped in half
1/2 red chilli, seeded and chopped finely (when you're seeding the chilli, be sure to remove the membrane - it's the hottest part)
1 lemon
1/4 C macadamia nuts
2 tsp macadamia oil
  1. Squeeze the juice of half the lime over the prawns. Cover and allow to marinate for 30 minutes.
  2. Tear the leaves into bite sized pieces.
  3. Layer the vegetables into a salad bowl. Top with prawns, macadamia nuts and chilli.
  4. Squeeze juice of remaining lime half and the lemon over the top. Drizzle macadamia oil over the dish.
Too easy. And delicious. And healthy.

25 February 2010

Simple Salmon

I'm still working a fairly ridiculous schedule at the moment, which has put a fairly large crimp in my cooking/blogging activities. Sad. But it at least reminds me why I started this blog - to share recipes that minimize input (time, money, effort) for maximum enjoyment.

In that vein, I bring you the miracle recipe- the dish with no washing up!

Simple Salmon

You will need:

1 frozen fillet of salmon
3 slices of lemon
Pepper
Spray oil

alfoil
oven tray
  1. Preheat oven to 200 C. Line oven tray with foil.
  2. Tear off large (approx 0.5 m) piece of foil. Fold in half lengthwise and spray with oil.
  3. Put salmon in the middle of foil on oiled side. Top with lemon and pepper.
  4. Fold the foil over the salmon and fold the edges up towards the centre. Crimp the edges of the foil so it forms a little parcel.
  5. Place parcel on tray and bake for 30 minutes.
  6. Serve with salad.
That is it! Add herbs (e.g. chives, bay) or spices (e.g. cinnamon, paprika) if you want extra flavour - but I think it's delicious with just lemon and pepper. Since the tray was lined with foil, it doesn't need washing. And if you use plastic cutlery and plates, the cleanup involves nothing more than throwing a couple of things in the bin. (Not the most environmentally friendly method, but hey, it gets the job done!)

23 February 2010

Emergency Eggs

At the moment, our office seems to have stepped up a gear. After being in there for over 12 hours, I got asked why I was leaving so early when I packed up at 8 pm (my official home time is 4 pm... ) so I'm not exactly flush with time to cook. That combined with the fact that my stove is currently chucking a tanty means that cooking time and resources are extremely limited. As such, I'm discovering a few low effort, low stress recipes I can pull out that take minimal time - and minimal cleaning up.

Today I just needed something comforting - so I pulled out the ol' emergency eggs.
Emergency Eggs
You will need:

2 eggs
2 tsp sour cream (or fresh cream if you prefer)
sprinkle of pepper

boiling water
small ramekin
deep oven tray
  1. Turn on oven and set to 190 C.
  2. Crack eggs into ramekin and top with sour cream.
  3. Place ramekin in deep tray.
  4. Pour boiling water into tray around ramekin and put in oven.
  5. Bake for 15 minutes or until whites are just set.
  6. Sprinkle on pepper to taste.
Serve with hot buttery toast and salad. Delish and comforting - and SO easy! And since the deep tray only held boiling water, the only washing up is a ramekin, your cutlery and your plate. Really, it's what you need when the going gets tough.

21 February 2010

Lemon Lime Bitters Cupcakes - a healthier take

This recipe marks the completion of my February cupcakes - the flavours have been taken from the classic Lemon Lime and Bitters cocktail. I used low GI sugar (yes it does exist! In Australia, it's sold under the brand name Logicane) and almond meal, which is full of protein, to make these low GI cupcakes. The best part was that they were moist, sweet and zesty - and tasted all together decadent.

Logicane looks a bit like raw sugar - the crystals are a bit tricky to dissolve (hence why I dissolved them in the hot lime juice rather than creaming with the eggs) - but its molassesey flavour and stickiness make it perfect for making SMBC - I actually thinks it makes a much better buttercream than caster sugar! The egg whites thicken up much more quickly than with other sugars.

These cupcakes have been (heavily!) adapted from this recipe.

Lemon Lime and Bitters Cupcakes with Lemon SMBC

You will need:

3 ripe limes
3 eggs
1 C Logicane sugar (or any low GI sugar)
3 C (300 g) almond meal
1 tsp gluten free baking powder.

1 lemon
1/2 C Logicane sugar
1/2 tsp aromatic bitters

2 egg whites
1/2 C Logicane sugar
125 g butter
  1. Preheat oven to 170 C and line 12 cake cupcake tin with patty pans.
  2. Zest and juice the limes (to ensure you've got every drop, microwave the limes for 10 seconds - it really frees up the juice!). Heat in the microwave (or over the stove) until body temperature. Dissolve 1/2 C Logicane in the juice (you may have to heat it a bit more! Just keep stirring and heating until its all dissolved).
  3. Separate the eggs.
  4. Whisk egg whites until stiff peaks form.
  5. Using the electric beater, whisk the yolks and 1/2 C Logicane until pale and creamy. Dissolve as much of the sugar as possible.
  6. Fold almond meal and baking powder into lime juice and zest.
  7. Fold whipped sugared yolks into almond meal mixture.
  8. Gently fold in whipped egg whites into almond meal mixture.
  9. Spoon mix into cupcake tin.
  10. Bake at 170 C for 20-30 minutes or until skewer inserted in centre of cakes comes out clean. Allow to cool for 15 minutes.
  11. Zest and juice lemon. Combine zest, juice and 1/2 C Logicane in a small saucepan. Boil and stir until sugar is dissolved and syrup has thickened. Set half aside.
  12. Add bitters to remaining syrup in the pan. You really just want to get the aroma of the bitters, not the horrible bitter taste! Cook for 30 seconds - this will boil off any alcohol.
  13. Using a toothpick, prick holes in the tops of the cakes. Spoon bitters infused syrup over tops of the cakes. (Put a paper towel underneath when you do this - that way if you have accidentally pierced through the patty pan, you won't get syrup all over your benchtop!)
  14. Put 2 egg whites and 1/2 C Logicane into the top of a double boiler over a pan of simmering water. Whisking constantly, cook until sugar has dissolved and mixture is warm (about 70 C).
  15. Pour heated egg whites into the bowl of an electric mixer. Beat egg white mixture on high speed until it forms stiff (but not dry) peaks. Continue beating until fluffy and cooled, about 7 minutes.
  16. With mixer on medium-low, add butter two tablespoons at a time, beating well after each addition. Increase speed to medium-high; continue beating until SMBC appears thick, about 3 minutes. Reduce speed to low; add lemon syrup and continue beating 2 minutes to eliminate air bubbles. Top cupcakes with buttercream.

Done! Moist, fluffy and zingy. Absolutely delicious, and worth every second. And you can feel a bit less guilty about eating them, too!